Graphs are like the picture books of math. Instead of paragraphs, they use lines, bars, and charts to tell stories about relationships between two or more entities and their values.
Graphs show up in weather reports, sports scores, fitness and other app dashboards, growth charts, and the list goes on, so knowing how to read them is a skill that helps us make sense of the world around us.
That’s why Mathnasium tutors have put together this practical guide to give parents the tools they need to explore the topic with their children and even have fun with it.

How to Read Different Types of Graphs (Kid-Friendly Examples)
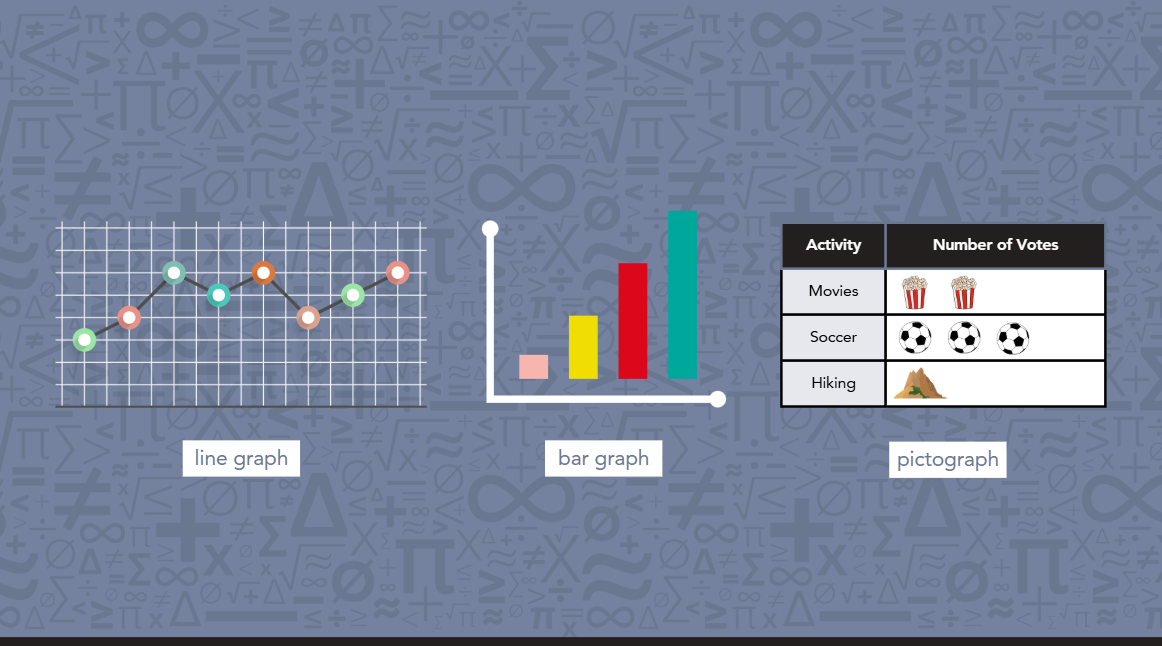
Different graphs show different kinds of information. As your child moves through elementary and middle school, they'll come across a variety of graph types, each with its own look, purpose, and story to tell.
At first, a graph might just look like a colorful picture to your child. But once they learn how to look closely and ask the right questions, they can start to spot patterns and figure things out for themselves.
Here's how to help them read the most common types of graphs they'll see in math class and everyday life.
1. Bar Graphs
Bar graphs use rectangles, or "bars," to compare different categories. The taller the bar, the higher the number it represents. They're great for comparing things like scores, quantities, or preferences.
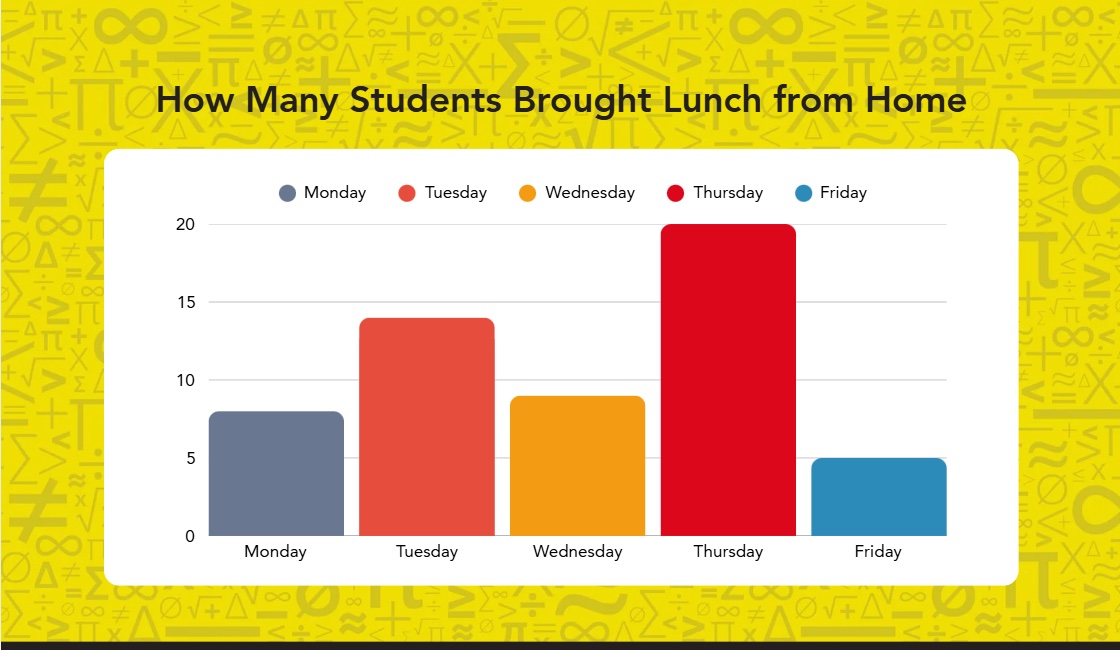
A classroom might use a bar graph to show how many students brought lunch from home each day of the week. Even without reading the graph in detail, we can see which day had the most students bringing lunch.
Students usually begin working with bar graphs in Grades 2–3, and they'll continue to use them throughout elementary school and beyond.
This is how we read it:
-
Step 1: Look at the title. Usually right above or below the graph, this tells us what the graph is about.
-
Step 2: Check the axes. Look at the horizontal and vertical lines. What are they measuring? How far does the scale go?
-
Step 3: Find the labels or legend. We need to know what each bar actually represents before we can start comparing them.
Once they understand the setup, gently nudge your child with questions like:
-
"Which bar is the tallest?"
-
"Which is the lowest bar?"
-
"What does that tell us?"
For practice at home, you can make a bar graph together to track weekly screen time, favorite family dinners, or the number of chores they've completed each day. Turn it into a mini-math moment by asking questions about the results.
📕 You May Also Like: What Is a Bar Model in Math?
2. Pictographs
Pictographs use pictures or symbols to show numbers. Instead of bars, each icon represents a certain amount of something. This makes data feel more fun and relatable for young learners.
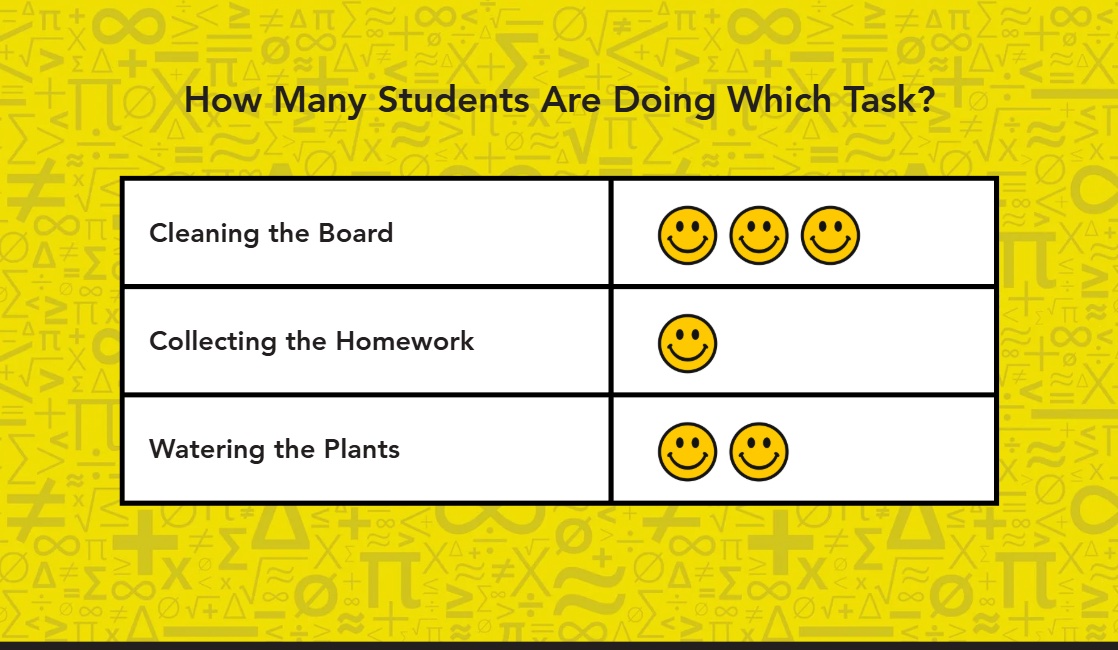
A teacher might show how many students chose different classroom jobs using smiley faces, where each face equals one student. Pictographs can be especially useful for young children who are still learning how to count.
Pictographs are commonly introduced in Grades 1–3, often before bar graphs.
This is how we read it:
-
Step 1: Find the key. What does each symbol stand for and how many does it represent?
-
Step 2: Count the symbols. Once they know what each picture means, it's a simple counting exercise.
If your child is still struggling, gently guide them with questions like:
-
"What does one picture represent?"
-
"Are we counting by 1s, 2s, 5s, or something else?"
-
"How many smiley faces are there in total?" or "Which row has the most?"
To really make the concept stick, you can make a simple pictograph together at home using stickers or drawings. For example, create a chores sheet that shows who in the family is doing which chore on a given day. Or use a pictograph to show who has won how many games during game night.
📕 You May Also Like: How to Teach Math to Visual Learners with Pictures & Manipulatives
3. Line Graphs
Line graphs use dots connected by lines to show how something changes over time. They help kids visualize trends: whether something is increasing, decreasing, or staying the same.
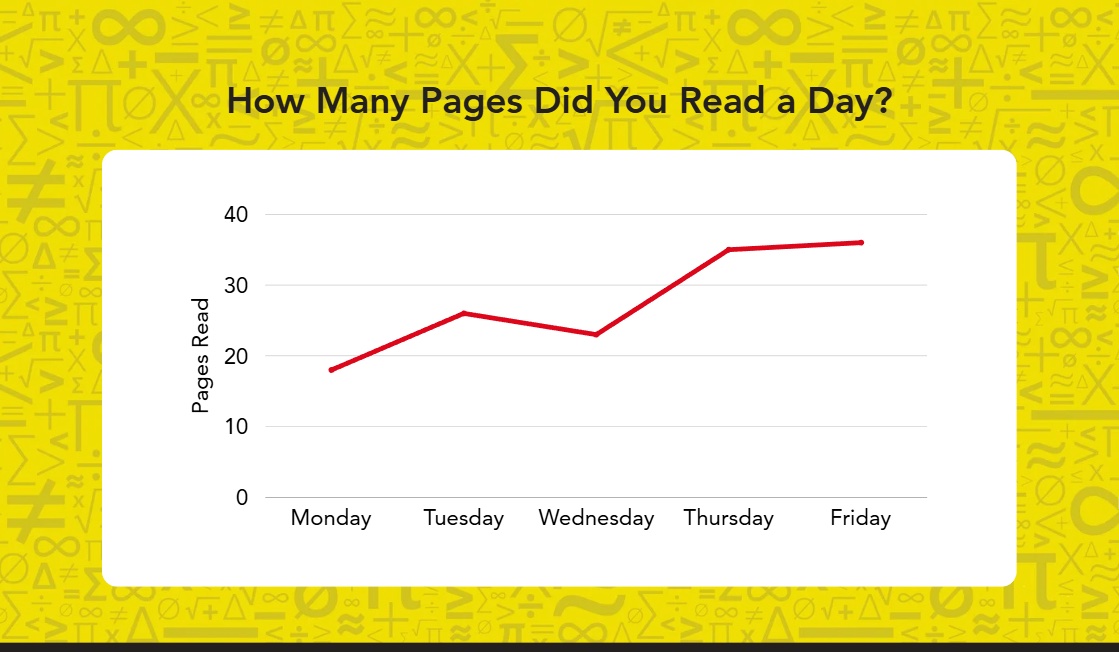
A student might track how many pages they read each day and plot that data on a line graph to see if they're reading more as the week goes on. While we can't tell the exact number at a glance, we can see that the number is getting higher.
Line graphs are typically introduced around Grades 4–5, once students are more confident working with number lines and patterns.
This is how we read it:
-
Step 1: Start with the axes. The bottom usually shows time (like days or months), and the side shows what's being measured (like minutes of exercise or daily temperatures).
-
Step 2: Look at the dots. Each dot shows what happened at a specific point in time.
-
Step 3: Follow the line. The line helps establish a pattern. Are you reading more, less or the same?
To help your child read a line graph, ask:
-
"Is it going up, down, or staying the same?"
-
"What does this dot mean?" or "What happened on this day?"
-
"Why do you think the numbers changed here?" or "What could have caused that dip?"
For practice, have your child track something simple over a week. For example, go on family walks and chart how many steps you've taken each day. Then, at the end of the week, ask "Where did we go when we walked the most?" or "Have our walks gotten longer or shorter?"
4. Pie Charts
Pie charts show how different parts make up a whole. The data is divided into "slices" of a circle, like pieces of a pie, with each slice representing a given percentage.

Your child might see a pie chart that shows the types of snacks their class prefers. If half the class chose apples, that slice would take up half the circle. For example, if the rest of the class liked chocolate and cookies best, the pie would be divided to show those proportions.
Pie charts are usually introduced around Grades 4–6, often as part of lessons on fractions and percentages.
This is how we read it:
-
Step 1: Look at the size of each slice. Bigger slices mean bigger portions. If half the circle is one color, that part makes up 50% of the total.
-
Step 2: Check the key or labels. Most pie charts include labels that explain what each slice stands for.
To help your child read a pie chart, ask:
-
"Which slice is the biggest?" or "Which is the smallest?"
-
"If we add these two slices together, do they make up more or less than half?"
-
"What fraction of the whole does this slice represent?"
For a more tangible example at home, cut a pizza or pie into slices and ask questions like, "If we ate two slices out of eight, what fraction is left?" You can also look at charts in magazines or websites together and talk about what each slice means.
📕 You May Also Like: How to Compare Fractions? A Kid-Friendly Guide

At Mathnasium, we help students connect math to the world around them.
How Mathnasium Helps Students Master Any Math Concept
At Mathnasium, we don’t treat graphs as just one topic but as one of the many tools we use to build understanding, reinforce problem-solving, and connect concepts to real meaning.
That’s part of a broader teaching strategy we call the Mathnasium Method™, our proprietary approach designed to help students develop deep, lasting comprehension.
To build a deep understanding of math, our approach relies on:
-
Personalized learning plans: Each student starts with a diagnostic assessment that reveals their strengths, learning gaps, and how they process math. These insights allow us to create a learning plan tailored to their exact needs.
-
Teaching for understanding: Our tutors use natural language and face-to-face instruction, paired with a blend of verbal, visual, mental, tactile, and written teaching techniques. When it comes to graphs, this means students might talk through a trend, sketch a bar chart by hand, or physically manipulate graphing components to make the data feel real, not abstract.
-
Caring tutors: Mathnasium tutors are trained not only in math but also in how to teach it with empathy. They know how to slow down and walk through a tricky line graph one moment and challenge a student to analyze patterns the next. That balance builds both skill and confidence.
-
Independent problem solving and critical thinking: During each session, students have time to work through tasks independently before reconnecting with their instructor to review and refine their approach. Our goal is to develop confident, self-reliant math thinkers. As we guide them, we focus on both the how and the why behind each answer, strengthening the reasoning skills they’ll use across all areas of math.
-
Singular focus on math: We specialize in math and math only. Our curriculum includes thousands of carefully developed pages, continually refined to reflect how students best learn, understand, and retain math skills.
-
Fun, confidence-building environment: Parents often tell us that Mathnasium sessions don’t feel like traditional lessons. Many activities are game-based, and we include frequent rewards to recognize progress. This keeps students engaged, motivated, and proud of what they’re accomplishing.
The results speak for themselves:
-
94% of parents report an improvement in their child's math skills and understanding
-
93% of parents report an improved attitude towards math after attending Mathnasium
-
90% of students saw an improvement in their school grades
With over 1,100 learning centers across the U.S., Mathnasium brings top-rated instruction to communities nationwide.
For families based in or near Parker, CO, Mathnasium of Parker is the go-to local center, with years of experience helping students of all skill levels excel in math.
Read what one parent had to say about their child’s Mathnasium journey.
If your child is looking to catch up, keep up, or get ahead in math, our team is ready to help!
📅 Schedule a Free Diagnostic Assessment at Mathnasium of Parker!
Mathnasium of Parker is not your nearest center?
📍 Find Mathnasium Learning Centers Near You


 (303) 840-1184
 (303) 840-1184