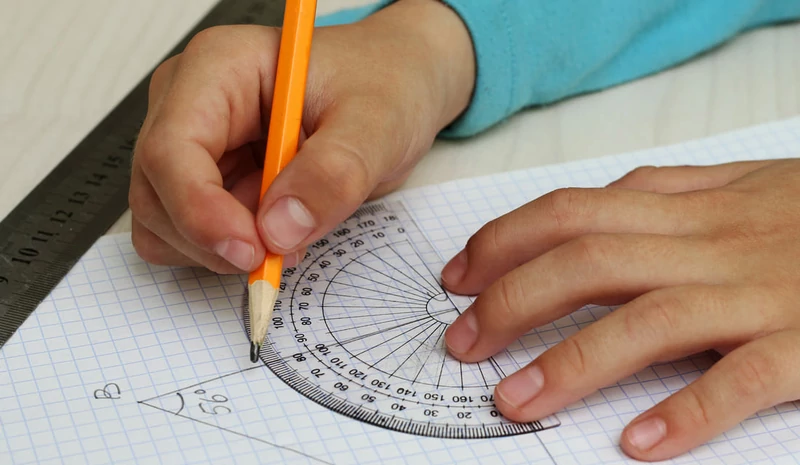
Students in the U.S. typically start learning to measure angles with a protractor in grade 4.
This is a skill you'll need as geometry gets more complex later on. It's a bit like learning to read a map before setting off on a road trip.
To help you get there, Mathnasium tutors put together this complete guide and covered:
-
What an angle is and how degrees work
-
The four angle types students encounter at this grade level
-
The parts of a protractor and what each one does
-
A clear, step-by-step measuring process
-
Worked examples for each angle type
-
Practice problems with answers

First, Let’s Review: What Is an Angle?
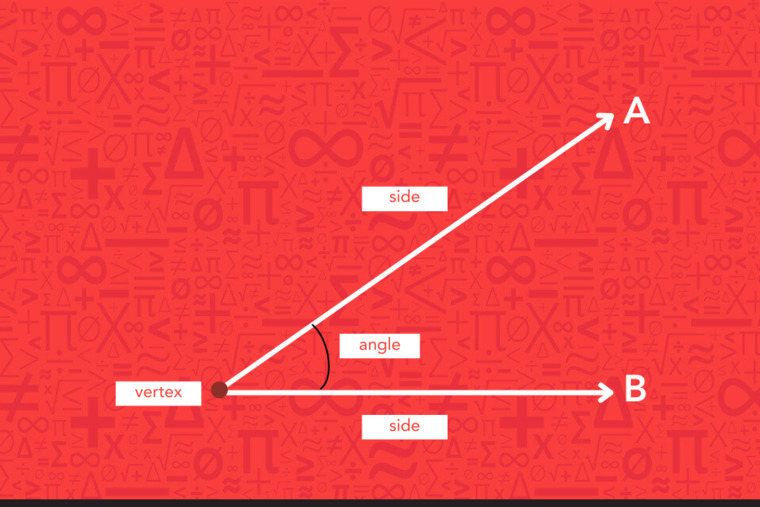
An angle is a figure formed by two rays that share a common endpoint. That shared endpoint is a vertex, and the two rays are the sides of the angle.
Angles are measured in degrees, written with the symbol °. Degrees tell us how wide or narrow the opening between the two rays is:
-
A very narrow opening means a small number of degrees
-
A very wide opening means a large number of degrees
-
The widest angle we measure with a standard protractor is 180°, which looks like a straight line
Not all angles look the same, and students in grades 4 and 5 learn to recognize four distinct types, each defined by its degree range.
📕 You May Also Like: What Is Vertex? Everything You Need to Know
Types of Angles
There are four angle types. We define each one by its degree range, and recognizing them is the first step toward measuring them accurately.
1. Acute Angle
An acute angle measures less than 90°. The opening between the two rays is narrow, smaller than the corner of a square.
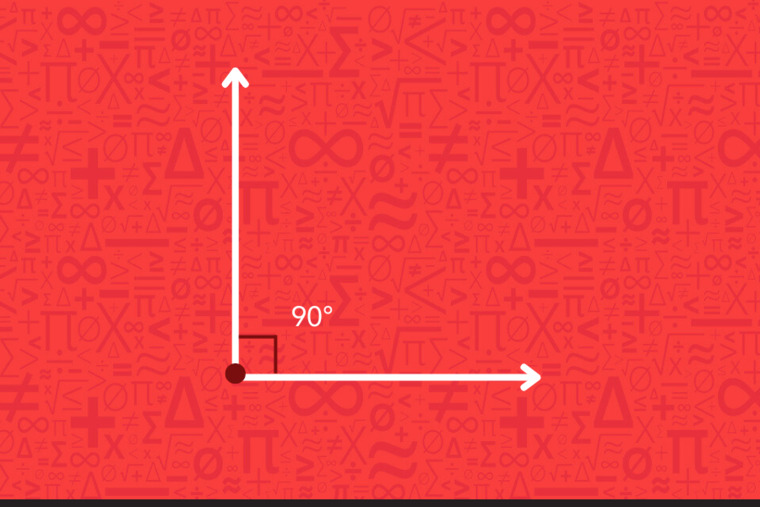
2. Right Angle
A right angle measures exactly 90°. It looks like the corner of a square or rectangle, and we often mark them with a small square at the vertex.
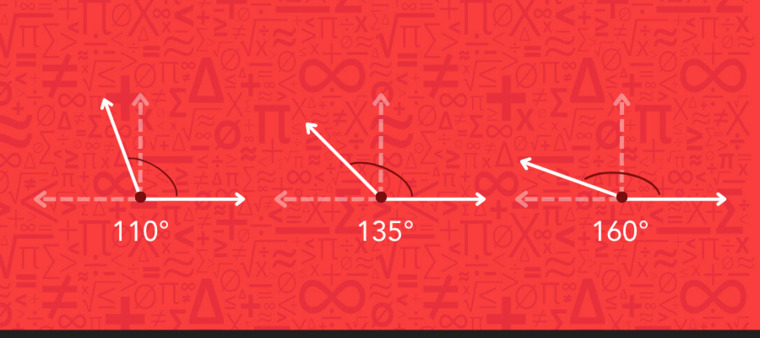
3. Obtuse Angle
An obtuse angle measures more than 90° but less than 180°. The opening is wider than a right angle but has not yet reached a straight line.
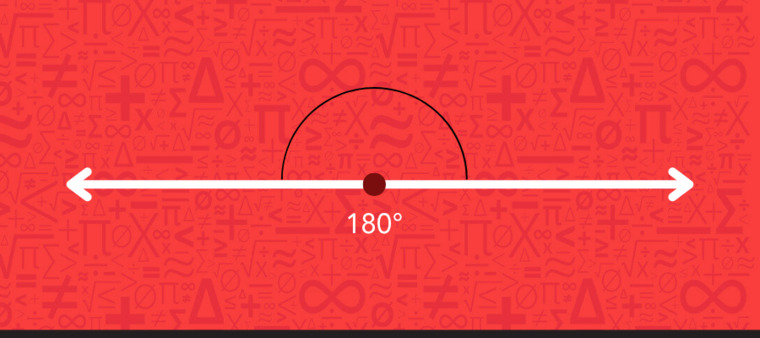
4. Straight Angle
A straight angle measures exactly 180°. The two rays point in opposite directions and form a perfectly flat line.
To measure all four angle types, the same process applies, and that process starts with one tool, the protractor.
📕 You May Also Like: Types of Angles: Acute, Right, Obtuse & Straight Explained
What Is a Protractor and How Does It Work?
We use a protractor to measure the size of an angle in degrees. Most protractors you will use are semicircular, which means they cover exactly half a circle, from 0° to 180°.
That half-circle has 180 equal parts, and each part counts exactly 1°. The wider the angle, the higher the degree reading.
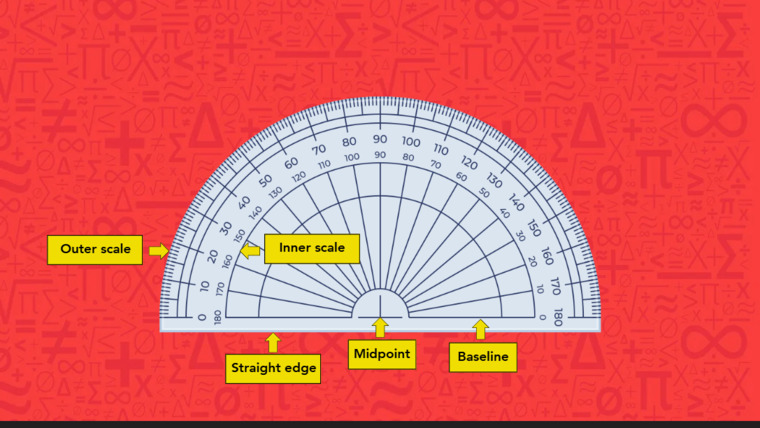
Main Parts of a Protractor
Here's what each part of the protractor does:
-
Midpoint (Center Point): The small hole or mark at the center of the straight edge. You place this directly on the vertex of the angle before any measurement.
-
Baseline (0° Line): The flat, straight edge running along the bottom of the protractor. To start the measurement, align one ray of the angle with this line.
-
Degree Scale: The numbered arc running along the curved edge of the protractor. We use this to read the final measurement.
-
Inner and Outer Scales: Most protractors have two rows of numbers running in opposite directions, from 0° to 180°. One scale reads left to right; the other reads right to left. We need to use the scale that starts at 0° on the aligned ray.
-
Straight Edge: The flat bottom of the protractor serves as the baseline and helps you align the tool cleanly against one ray of the angle.
How to Measure Angles with a Protractor
The following steps apply to every angle type, and you will use the same process every time.
-
Step 1: Find the vertex, the point where the two rays meet. This is where we’ll anchor the protractor.
-
Step 2: We need to place the midpoint on the vertex. Even a small misalignment here can affect your reading, so take a moment to get it right.
-
Step 3: Let’s align one ray with the 0° line. Either ray works, as long as it lines up cleanly.
-
Step 4: Choose the correct scale. Most protractors have two scales. You need to use the one that starts at 0° on the aligned ray. If the ray aligns with the inner 0°, use the inner scale. If it aligns with the outer 0°, use the outer scale.
-
Step 5: Read the measurement. Find where the second ray crosses the scale, and that number tells you the angle measurement in degrees.
Solved Examples: Measuring Angles with a Protractor
Let's see how these steps play out in practice.
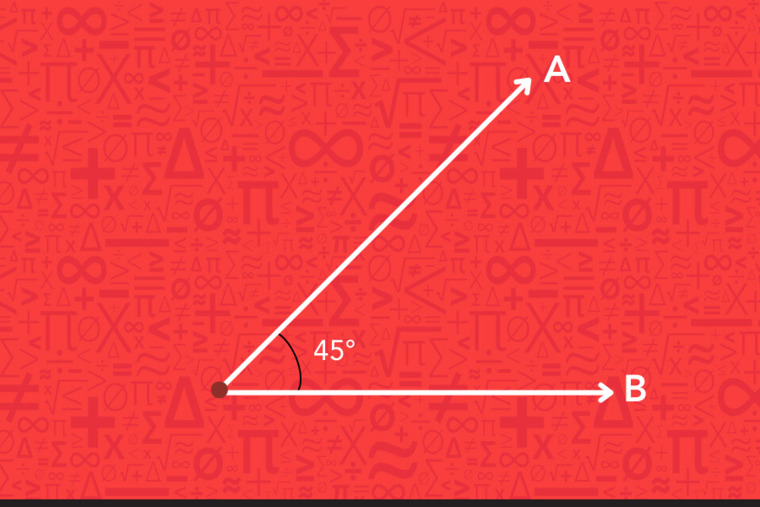
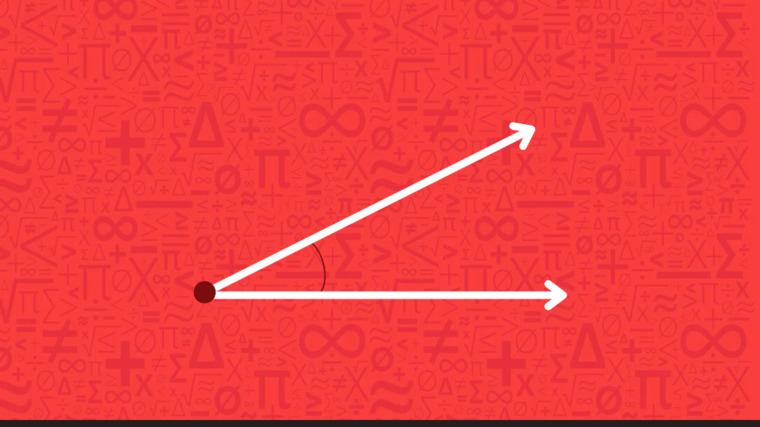
Example 1
Suppose we want to measure this angle.
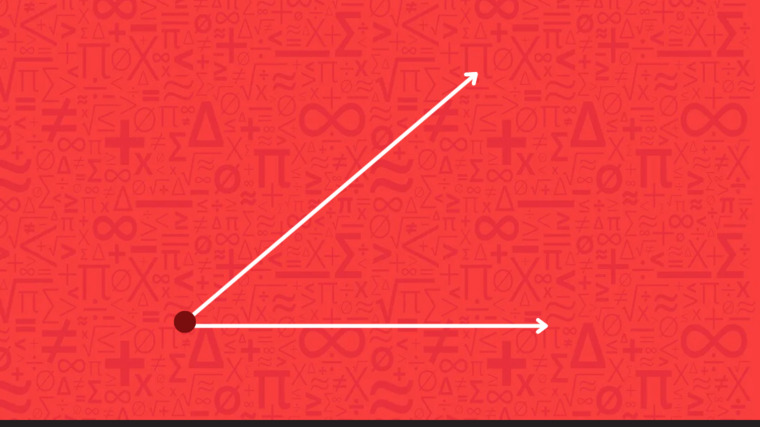
Place the midpoint on the vertex and align one ray with the 0° line. The angle opens to a narrow point, so we expect a reading below 90°. If you read from the scale that starts at 0° on the aligned ray, the second ray crosses at 40°.
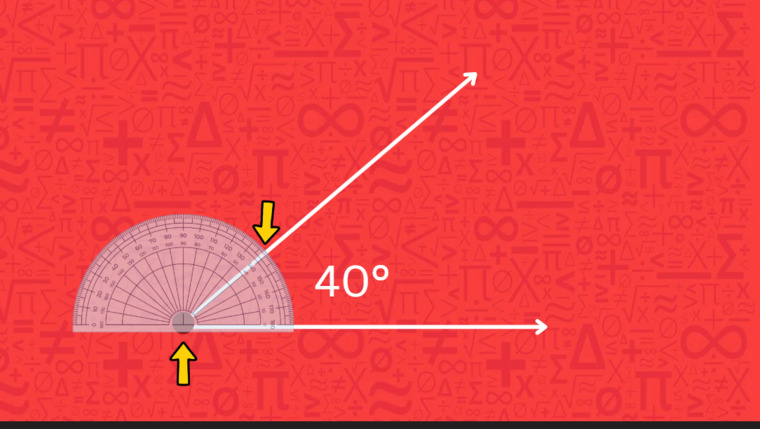
Since the angle measures 40°, it is an acute angle.
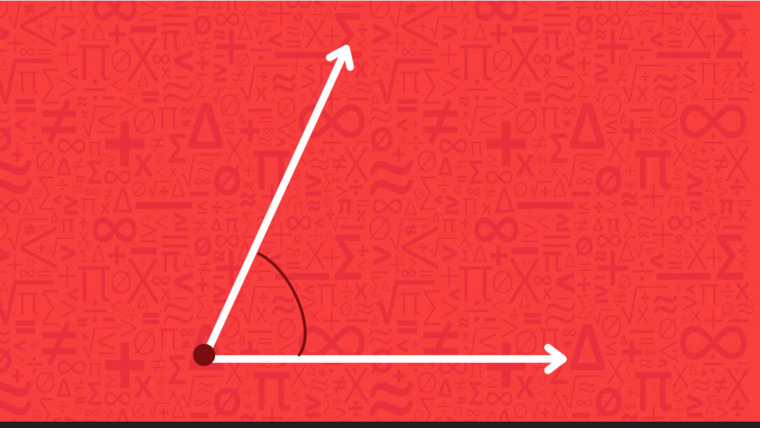
Example 2
Now let's try this one.
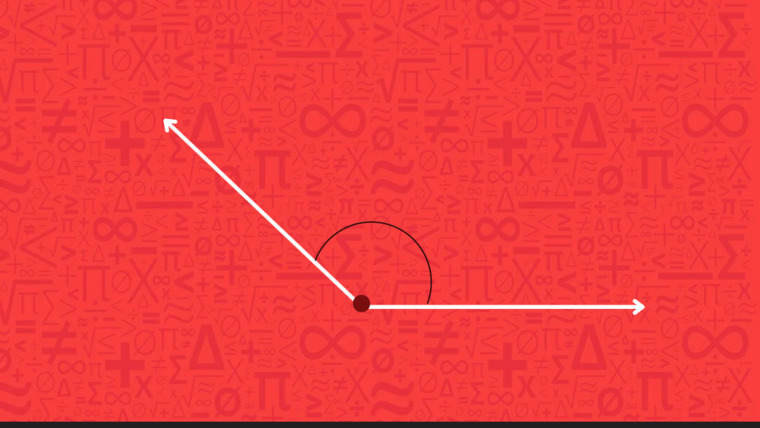
Again, place the midpoint on the vertex and align one ray with the 0° line. This angle opens wider than a right angle, so we expect a reading above 90°. The second ray crosses the scale at 137°.
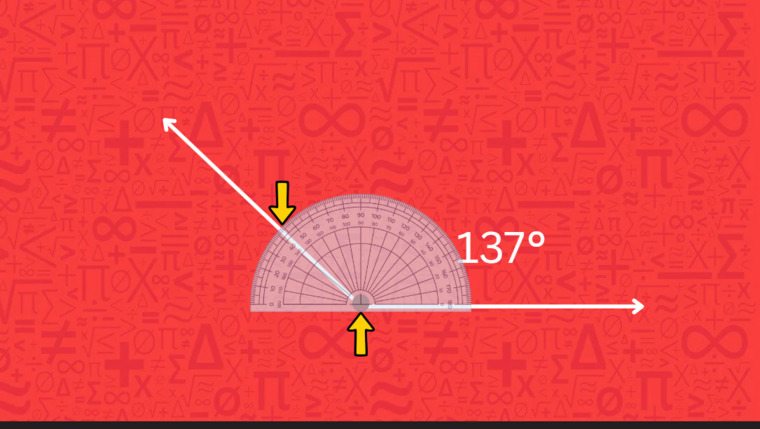
Since the angle measures 137°, it is an obtuse angle.
Do-It-Yourself: Can You Measure These Angles?
Use the following problems to test your understanding. Before you start measuring, always identify the angle type first to catch scale-reading errors early.
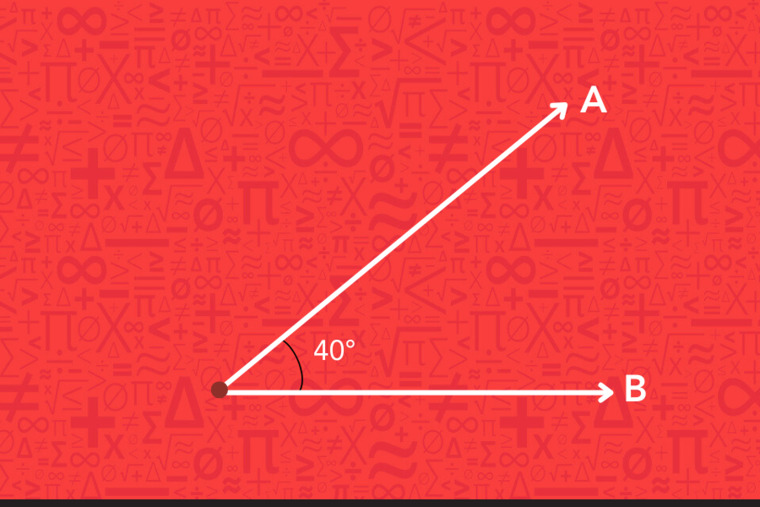
Challenge 1:
This angle has a narrow opening. What do you think it measures?
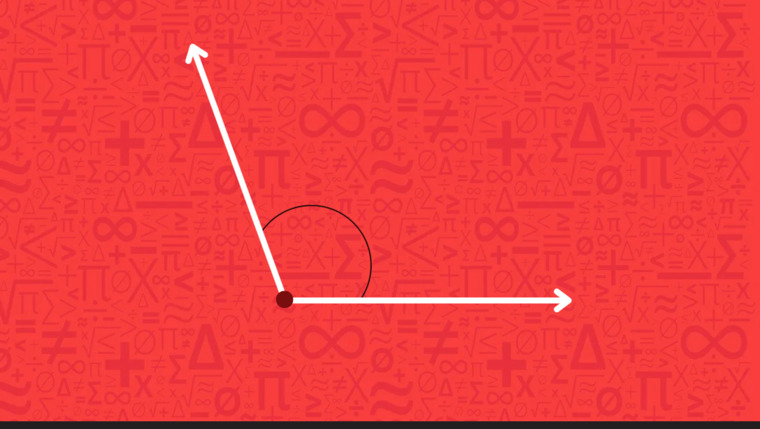
Challenge 2:
This one opens wider than a right angle. Can you find the exact measurement?
Challenge 3:
Here's one more. Work through the steps and see what you get.
Frequently Asked Questions About Measuring Angles with a Protractor
Here are a few commonly asked questions we hear from our students, with their answers:
1. Can a protractor measure any angle?
A regular classroom protractor measures angles from 0° to 180°. That includes all the angles you will encounter in grades 4 and 5: acute, right, obtuse, and straight.
Angles larger than 180°, called reflex angles, are saved for later grades. You will not be expected to measure those yet.
2. What should I do if the angle opens to the left?
The measuring steps stay exactly the same. Place the midpoint on the vertex, align one ray with the 0° line, and use the scale that starts at 0° on that ray.
The key is to always read from the 0° on the aligned ray, instead of from the side the angle opens toward.
3. What if the measurement is one or two degrees off?
If you are off by a degree or two, it is normal at this grade level. It usually happens when the midpoint is not placed exactly on the vertex or when the ray is not perfectly aligned with the baseline.
The most important thing is that the measurement makes sense for the angle type. A reading close to 90° for a right angle or clearly above 90° for an obtuse angle shows you understand the concept.
4. What Comes Next in Geometry?
The skills you build in grades 4 and 5 lay the groundwork for everything that comes next in geometry. The accuracy and attention to detail developed now will serve you well as the material grows more complex.
In grades 6 and beyond, angle knowledge applies to:
Each of those topics builds directly on what you are learning now. A solid understanding of how to measure and classify angles makes the transition into that material significantly smoother.
 Mathnasium's specially trained tutors help students work through angle measurement and geometry in a caring and fun group environment.
How Mathnasium Helps Students Master Any Geometry Concept
Mathnasium is the only math-only learning center helping K-12 students of all skill levels learn and master math, angle measurements included.
For us, mastery goes beyond getting the right answer. Mastery means understanding why the answer is correct well enough to apply the same reasoning to a problem they have never seen before.
To help students reach that level of understanding, we use the Mathnasium Method™, a proprietary teaching approach. Unlike a one-size-fits-all curriculum, our approach is designed around each student's individual needs and learning style.
Our approach begins with a diagnostic assessment that reveals their strengths and knowledge gaps. Those insights inform a personalized learning plan tailored to their goals.
With the plan in place, our tutors deliver face-to-face instruction in a warm and supportive setting.
To make math make sense, we use natural language and a combination of verbal, visual, mental, tactile, and written techniques.
If students hit a wall with a concept like angle measurement, we break it down into manageable steps, showing them both the how and the why behind the answer. This helps them develop the problem-solving tools and critical thinking they can use in math and beyond.
Fun is a core part of how we work. Our activities are often game-based, students earn rewards, and every bit of their progress is celebrated. This keeps them truly engaged and their confidence growing with every session.
The results speak for themselves:
-
94% of parents report an improvement in their child's math skills and understanding
-
93% of parents report their child's improved attitude toward math
-
90% of students saw an improvement in their school grades
With over 1,100 learning centers, Mathnasium brings top-rated math instruction close to your community.
For families in and around Denver, Mathnasium of Denver Highland is a trusted local center with years of experience helping students build the math skills and confidence they need to succeed at every grade level.
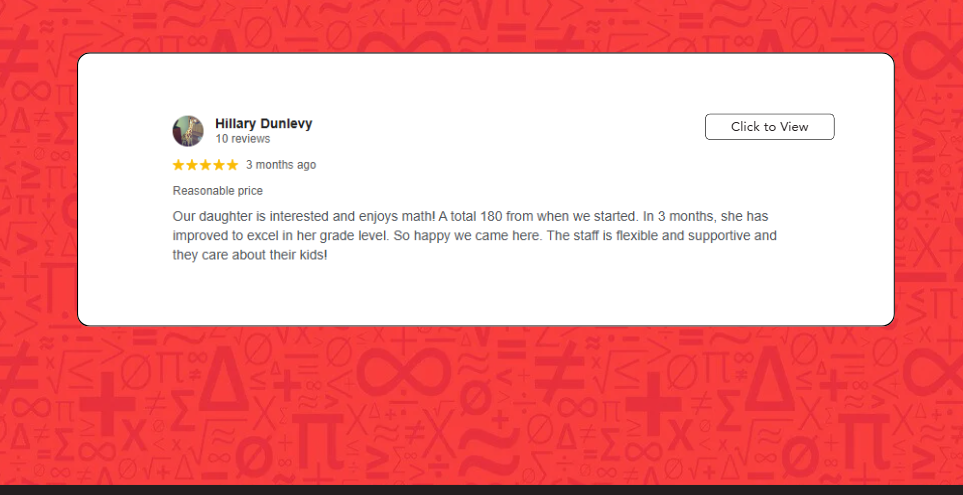
Here’s what one Denver parent shared about their experience with Mathnasium:
Ready to take the first step? Schedule a free assessment at Mathnasium of Denver Highland and set your child on a path to math mastery.
📅 Schedule a Free Assessment at Mathnasium of Denver Highland
Not located near Denver?
📍 Find a Mathnasium Learning Center Near You
Pssst! Check Your Answers Here
If you worked through the challenges, here are the answers:
-
Challenge 1: 26°
-
Challenge 2: 110°
-
Challenge 3: 65°
How did you do?


 (720) 524-4763
 (720) 524-4763